
-
-
20 Jan 2017
[Updated] GitHub + Gmail — Filtering for Review Requests and Mentions
Written by Tim Bielawa
Update – 2017-01-27
Just 3 days after publishing this blog post GitHub made a new blog post:
Pull request reviews are a great way to share the weight of building software, and with review requests you can get the exact feedback you need.
To make it easier to find the pull requests that need your attention, you can now filter by review status from your repository pull request index.
Source: Filter pull request reviews and review requests
I have tried this out and it’s great! Like most everything else on GitHub it’s very intuitive and simple to use. I won’t steal their thunder and describe it all here. So go check out the blog post for yourself and read up on the details (screenshots included!).
Continue reading if you’re still interested in incorporating this kind of filtering and labeling into your Gmail account.
The Problem
I’ve been looking for a way to filter my GitHub Pull Request lists under the condition that a review is requested of me. The online docs didn’t show any filter options for this, so I checked out the @GitHubHelp twitter account. The answer was there on the front page — they don’t support filtering PRs by
review-requested-by:meyet:@zaghnaboot Adding a filter for reviewers is definitely on our radar, though I don’t have a specific timeline to share. –SJ
— GitHub Support (@GitHubHelp) January 19, 2017
So what is one to do? I’m using Gmail so I began considering what filter options were available to me there. My objectives were to clearly label and highlight:
- PRs where review has been requested
- Comments where I am
@mention‘d
Interested in knowing more? Read on after the break for all the setup details.
-

This post is about renewing SSL certificates. There’s not a lot of information I want to communicate here, so I’m going to keep it short.
Yesterday the SSL certificate for
https://blog.lnx.cxexpired. I don’t know much about SSL, other than I find it more confusing/complicated than most things. I knew that I needed to renew the SSL certificate for the blog, but I did not know what that exactly meant. When I called my cert provider on the phone to renew, they told me that the renewal process begins with submitting a new Certificate Signing Request, orCSRin crypto parlance. We ended the call shortly thereafter and I set off to get started.I still had questions though. If I’m “renewing” my SSL certificate, does that mean my existing certificate is involved in some way? When I began reviewing the CSR generation procedure I saw no references to existing certificates. I did a bit of Internet research to try and figure this out.
Eventually I found out that the idea of “renewing” a certificate is a bit of a misnomer. That is, nothing you have carries over with you. The process of “renewing” a certificate is actually the exact same process as getting an initial certificate. I’ll say that again for clarity:
Renewing an SSL certificate is the exact same thing as getting your first SSL certificate.
I hope this helps out other folks who are as confused as I was about the renewal process.
-
I wanted to use a Logitech R400 that a friend loaned my in a presentation, but I wanted to tweak the mappings for the buttons a bit. My presentation is done using Reveal.js and uses both left/right and up/down. The R400 has four buttons but two of them are mapped to “go to black screen” and “slideshow mode” neither of which is useful to me. Here is how I fixed it in Fedora 20.
- Create the directory
/etc/udev/hwdb.d - Write the following out to
/etc/udev/hwdb.d/99-logitech-r400.hwdb# The lower left button actually emits two # different scancodes depending on the state of # the "presentation". # E.g. one code to start and one to stop. keyboard:usb:v046DpC538 KEYBOARD_KEY_70029=up KEYBOARD_KEY_7003E=up KEYBOARD_KEY_70037=down KEYBOARD_KEY_7004B=left KEYBOARD_KEY_7004E=rightThis maps the left and right buttons to left and right, the both states of the slideshow button to up, and the blank screen button to down. The
046Dis the Logitech vendor code and theC538is the model number. Those magic numbers after “KEYBOARD_KEY” are the scancodes associated with the button. Supposedlyshowkey --scancodeswill display them but I couldn’t get that to work and ended up taking them from another blog post. - Now we need to load this information.
# udevadm hwdb --update && udevadm trigger - We can test by running the command below and pushing the buttons
# xev | grep -A2 --line-buffered '^KeyRelease' | sed -n '/keycode /s/^.*keycode \([0-9]*\).* (.*, \(.*\)).*$/\1 \2/p' - Everything should work now, but if we unplug the USB receiver everything gets reset. That’s annoying so we will fix it
- Write the following to
/etc/udev/rules.d/99-logitech-r400.rulesSUBSYSTEMS=="usb", ATTRS{idVendor}=="046d", ATTRS{idProduct}=="c538", IMPORT{builtin}="hwdb 'keyboard:usb:v046DpC538'", RUN{builtin}+="keyboard"That will import our custom mapping when the USB receiver is plugged in.
Thanks to the following who helped me figure all this out:
- Create the directory
-
Much of the data in the PKI world is stored in Abstract Syntax Notation One (ASN.1) so a basic understanding is necessary. ASN.1 is a way to describe data by starting from primitive types and building up to more complex types. Do you remember Backus-Naur Form? What about writing XML schemas in XSD? It’s the same concept.
Let’s say we have a Widget. Every Widget has a model name, a serial number, and some inspection information with the name of the inspector and the dates of the inspections. Our Widget then looks like this in ASN.1:
Widget ::= SEQUENCE {
    model IA5String,
    serialNumber INTEGER,
    inspections InspectionInfo
}

InspectionInfo ::= SEQUENCE {
    inspectorName IA5String,
    inspectionDates SEQUENCE OF DATE
}
Now let’s go over that. A SEQUENCE is one of the four ASN.1 structured types and it’s just an ordered collection of items. Inside that sequence we have an IA5String (International Alphabet 5 — basically ASCII), an INTEGER, and then an item of InspectionInfo type. We continue down and see InspectionInfo is also a SEQUENCE containing the inspector’s name and the inspection dates. The inspection dates are a SEQUENCE OF, another structured type that holds zero or more occurrences of a given type. In this case, the given type is DATE.
There is more to it that I don’t understand, but that is enough for the RFCs to make sense.
Now that we have our widget defined, we’ll use an ASN.1 library to build a data structure and then write it to DER. DER (Distinguished Encoding Rules) is just a way to encode an object in binary in a strict, unambiguous manner. Alternatively, we can define an ASN.1 structure and decode DER into it.
DER vs PEM
DER is the ASN.1 data encoded in binary, but DER isn’t so great if you need to email a public key to someone for example. The binary is apt to get screwed up in transit. So we just take the DER, encode it in Base64 and add on BEGIN and END markers. If you need something in DER, it’s as simple as striping off the markers, removing all the newlines, and then Base64 decoding. Do note, however, that OpenSSL can add “headers” to PEM files. For instance, if an RSA private key has been encrypted with DES3, you’ll see something like
Proc-Type: 4,ENCRYPTED
DEK-Info: DES-EDE3-CBC,C0F5225DEC6ADA07
before the actual Base64 encoded data. This is weird and from what I can tell non-standard. Here is how BouncyCastle reads PEM files.
PKCS Specifications
The PKCS specifications are just ways to specify the ASN.1 for different PKI needs. There is a good overview here. If you’re ever in doubt, use openssl’s asn1parse command and it will show you all the gory details.
Let’s look at an example. PKCS1 defines the format of public and private RSA keys. OpenSSL outputs the RSA keys it generates in PKCS1 (this example goes for unencrypted keys; encrypted keys are in the non-standard format I mentioned earlier). Now that we know ASN.1, we can decode them. Here is the ASN.1 for RSA private keys in PKCS1:
RSAPrivateKey ::= SEQUENCE {
    version           Version,
    modulus           INTEGER,  -- n
    publicExponent    INTEGER,  -- e
    privateExponent   INTEGER,  -- d
    prime1            INTEGER,  -- p
    prime2            INTEGER,  -- q
    exponent1         INTEGER,  -- d mod (p-1)
    exponent2         INTEGER,  -- d mod (q-1)
    coefficient       INTEGER,  -- (inverse of q) mod p
    otherPrimeInfos   OtherPrimeInfos OPTIONAL
}

Version ::= INTEGER { two-prime(0), multi(1) }
    (CONSTRAINED BY {
        -- version must be multi if otherPrimeInfos present --
    })

OtherPrimeInfos ::= SEQUENCE SIZE(1..MAX) OF OtherPrimeInfo

OtherPrimeInfo ::= SEQUENCE {
    prime             INTEGER,  -- ri
    exponent          INTEGER,  -- di
    coefficient       INTEGER   -- ti
}
That’s a lot of stuff, but the otherPrimeInfos bit is optional and it’s unlikely that we’ll care about the version. Here’s how we would parse this using JSS and turn it into a usable Java object:
private KeyPair readPrivateKey(byte[] der, String password)
    throws CertificateException {
    try {
        SEQUENCE.Template template = SEQUENCE.getTemplate();

        // Create a template for the sequence matching the PKCS1 format
        for (int i = 0; i < 9; i++) {
            template.addElement(INTEGER.getTemplate());
        }

        SEQUENCE seq = (SEQUENCE) template.decode(new ByteArrayInputStream(der));

        //element 0 is the version which we don't need
        INTEGER mod = (INTEGER) seq.elementAt(1);
        INTEGER pubExp = (INTEGER) seq.elementAt(2);
        INTEGER privExp = (INTEGER) seq.elementAt(3);
        INTEGER p1 = (INTEGER) seq.elementAt(4);
        INTEGER p2 = (INTEGER) seq.elementAt(5);
        INTEGER exp1 = (INTEGER) seq.elementAt(6);
        INTEGER exp2 = (INTEGER) seq.elementAt(7);
        INTEGER crtCoef = (INTEGER) seq.elementAt(8);

        rsaKeyFactory = KeyFactory.getInstance("RSA");
        RSAPublicKeySpec pubSpec = new RSAPublicKeySpec(mod, pubExp);
        RSAPrivateCrtKeySpec privSpec = new RSAPrivateCrtKeySpec(
            mod, pubExp, privExp, p1, p2, exp1, exp2, crtCoef);

        return new KeyPair(
            rsaKeyFactory.generatePublic(pubSpec),
            rsaKeyFactory.generatePrivate(privSpec));
    }
    catch (Exception e) {
        throw new CertificateException("Could not read private key", e);
    }
}
What does that method do? First it defines a template that matches the PKCS1 ASN.1 (a SEQUENCE of 10 INTEGERs). Then we give the template a byte array and tell it to decode our DER data. Now we have the data in a SEQUENCE and we just pluck out the elements that we care about (in this case all the math stuff). We take the elements and define a KeySpec from them. We feed the KeySpec into a KeyFactory and build the KeyPair.
PKCS12 Keystores
The PKCS12 format is a little more complicated. It defines a way to store a bunch of X509 certs and key pairs all in one file and then have that file encrypted. Thus, these files are often called “keystores”. If you are dealing with keystores often (either PKCS12 or the Java alternative, JKS), I recommend a tool called Portecle. It’s a GUI that let’s you see everything in a keystore, import or export items, and generate CSRs or import signed certs.
Why do we need a keystore? A freshly installed Fedora machine is only going to have a small list of accepted certificate authorities (CAs). You can either get a certificate that has a chain stretching back to one of these root CAs (like Thawte or Verisign) or you can install an additional CA into the system’s list of acceptable CAs. If you opt for the chain of trust approach, then a keystore is a good way of keeping everything in one package.
(On a side note, if you want to install an additional CA into your Fedora machine, drop it in /etc/pki/ca-trust/source/anchors/ and run the
update-ca-trustcommand.)PKI File Extensions
There are a lot of file extensions for PKI objects: pem, der, csr, key, crt, p12, etc. Naming a file “.pem” is pretty pointless as that only tells you the format and not what the object in the file is. In my opinion, it’s best to use extensions that mean something like “.key” for a private key, “.csr” for a certificate signing request, or “.p12” for a PKCS12 keystore.
Conclusion
Of course there is a lot more to learn about PKI, but hopefully this primer will give you a basic foundation.
-

This is an update to my previous post about my (then) upcoming conference presentation.
The slides from my session at Red Hat Summit 2014, JBoss in the Trenches, are now posted online. Most of the slides have generous amounts of extra material in their notes.
- JBoss_In_The_Trenches.pdf – 2.57MiB
- JBoss_In_The_Trenches.odp – 8.51MiB
And as a bonus, here’s a select few pictures from the trip to San Francisco:
-
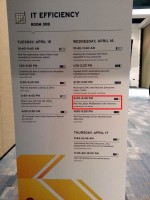
- Room Schedule
-
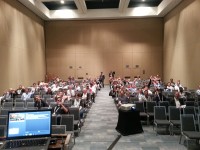
- Audience
-

- Start Something Different
-
-

![]()
Technitribe by Tim Bielawa is licensed under a Creative Commons Attribution-ShareAlike 4.0 International License.